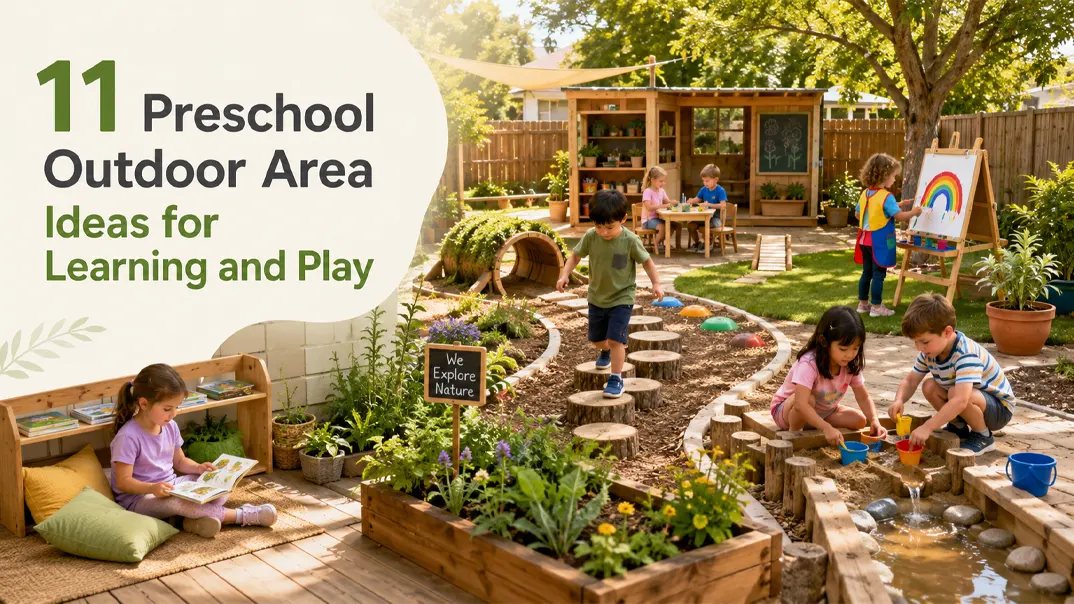
Many preschools make the same mistake when designing their outdoor spaces: they place equipment wherever it fits and treat the area only as a place for children to burn off energy. Like an indoor classroom, an outdoor area needs careful planning to become a well-organized extension of the learning environment.
If you are struggling with a cluttered yard or limited space, these 11 preschool outdoor area ideas will provide some inspiration to help you create an outdoor environment that naturally encourages children to explore independently.
1. Outdoor Reading Corner
Outdoor reading corners provide children with a wonderful space for sensory relaxation, allowing them to relax after active play. It also naturally connects reading activities with the outdoor environment, letting children know that reading can happen anywhere.
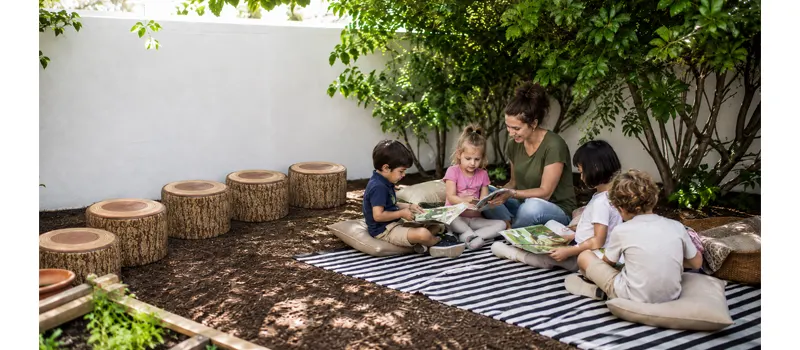
- Direct sunlight makes reading impossible and overheats seating surfaces. Choose a quiet, shady spot away from noisy play areas. A fenced corner, covered patio, or space beneath a large tree can work well.
- Use a low shelf, planter, or short divider to define the area. Keep the entrance open and avoid tall barriers so teachers can supervise children from other parts of the playground.
- Choose mobile book storage that’s easy to bring indoors every day. Pair these with low-profile, structurally stable preschool seating made from weather-treated materials.
- For a permanent setup, add a covered shelter, fixed seating, reading den, and lockable outdoor storage. Make sure all structures are securely installed and suitable for outdoor use.
- If you have limited space or a limited budget, you can skip installing fixed seating. Simply lay down a waterproof outdoor rug, pair it with stackable, easy-to-clean cushions, and a book basket can quickly create a reading corner.
2. Mud Kitchen
การ mud kitchen is an ideal place for unstructured sensory play. Children can practice fine motor skills while engaging in cooperative and imaginative play. Because the activity itself is bound to be messy, the layout needs to be carefully designed to minimize the daily cleanup time for staff.
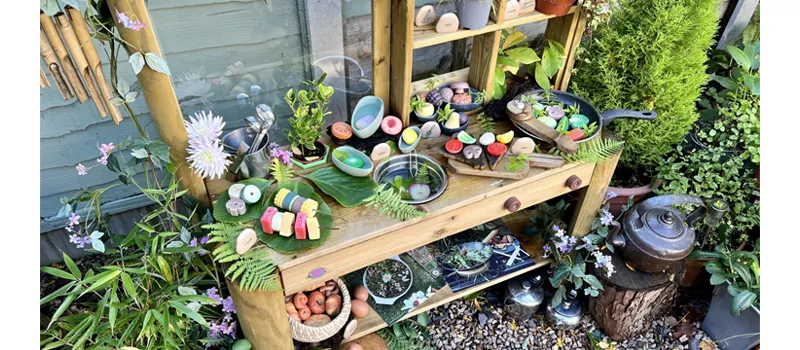
- Place it on a level, well-drained surface near a water source. Keep it away from main paths so spilled water and mud do not create slipping hazards.
- Choose a mud kitchen made from treated wood. Provide a child-sized worktop, sink or basin, and durable metal pots and pans. Do not use inferior plastic toys.
- Standing water is a health hazard that breeds mosquitoes and bacteria. Ensure your sinks or basins have working drainage holes or can be easily tipped to empty.
- For restricted budgets or tight spaces, a simple deep plastic box set on a sturdy, low table with a few metal buckets does the job perfectly.
- If you have the footprint and budget, invest in a multi-station, double-sided mud kitchen with integrated hand pumps and overhead utensil racks, allowing several children to work simultaneously without conflict.
3. Nature and Gardening Area
Gardening transforms everyday outdoor experiences into hands-on learning opportunities, allowing children to learn about plants, insects, and natural materials. Here, children can dig, plant, observe, and compare. This direct contact helps children understand nature through real-world experiences.
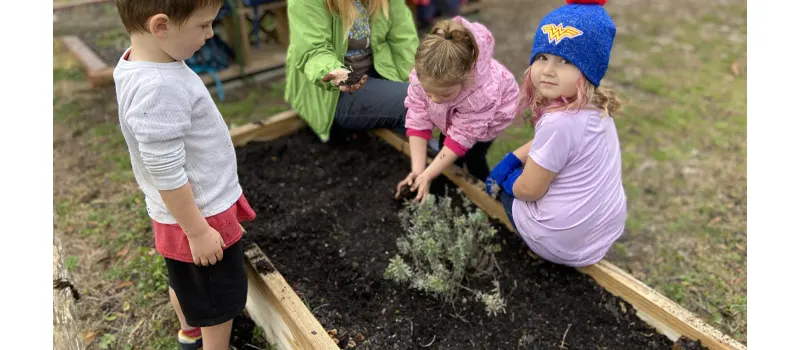
- Use raised beds, pots, or planters that children can easily reach. Leave enough space between them for watering, digging, and group work.
- Grow non-toxic plants suited to your climate. Fast-growing herbs, flowers, beans, lettuce, and strawberries give children visible results and encourage regular care.
- Install an insect hotel to encourage close-up observational learning and spark early biology discussions.
- Add watering cans, rounded gardening tools, magnifying glasses, collection trays, and simple plant labels.
- Include leaves, stones, pinecones, bark, or seed pods for sorting, counting, comparing, and creative play.
- A small yard does not need a full garden. Several pots, a vertical planter, and a nature observation table can provide the same type of hands-on experience.
- Avoid chemical pesticides and fertilizers. Check plants, soil, tools, and collected natural materials regularly for sharp edges, mold, insects, or toxic items.
4. Art Center
Bringing the art center outdoors can remove the anxiety caused by a messy indoor environment and inspire children’s unbridled creativity. Setting up an outdoor art center provides children a space to explore various textures and colors freely, allowing them to draw inspiration directly from the natural environment.
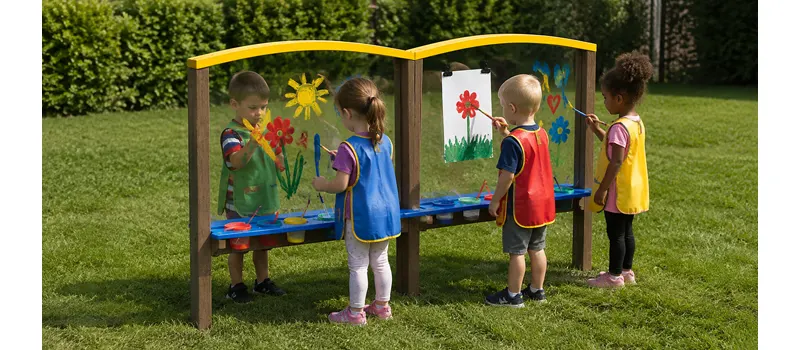
- Place it near water access. Protect it from strong wind, which can scatter paper and lightweight materials.
- Use transparent acrylic easels. Allow children to paint directly over the natural landscapes they see through the clear canvas, merging art with nature.
- Provide child-height worktables, drying racks, and storage for paint, brushes, clay, chalk, and natural materials.
- Use a mobile art trolley if the area is shared or has no permanent storage. You can prepare materials indoors and move the trolley outside when needed.
- Add clips, trays, or weighted containers to keep materials in place. Choose washable, non-toxic art supplies and avoid glass containers.
- For a small budget, start with a chalkboard or portable easel. A larger area can include several workstations for painting, construction, and clay.
5. Outdoor Learning Area
An outdoor learning area bridges the gap between traditional instruction and nature. By creating a structured gathering space outside, you offer a fresh environment for circle time, storytelling, and small group lessons. This change of scenery naturally resets students’ attention spans and improves focus without feeling rigidly academic.
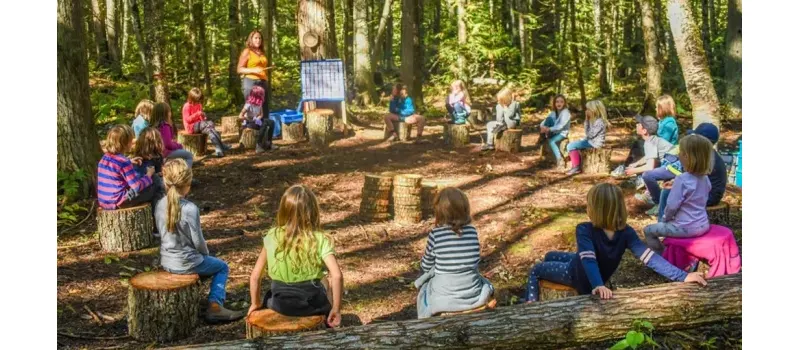
- Keep the space shaded and away from busy paths, but make sure teachers can still supervise the wider outdoor area.
- Use modular preschool seating or sturdy log-style stools. Arrange them in a semi-circle around the central presentation table so that children can see the teacher and other children.
- Ensure the ground beneath the seating and tables is level to prevent furniture from tipping. Keep all seating low to the ground to meet toddler safety standards.
6. Sand and Water Play Area
Sand and water stations are foundational for early STEM learning and sensory exploration. This area naturally encourages cooperative play as children negotiate space and materials, while simultaneously teaching them basic physics concepts like volume, weight, and flow through direct, hands-on experimentation.
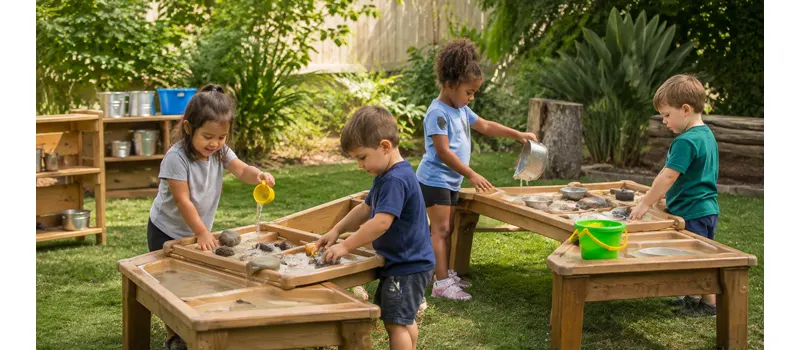
- Place water play near a water source and on a non-slip, well-drained surface. Direct runoff away from paths and other dry activity areas.
- If you want several children to dig, build, and play in the sand together, you can choose a sandpit. Install it in a visible, shaded area with clear boundaries and enough surrounding space for children to enter and leave safely.
- For a smaller yard, use a sand table or lidded sand-and-water table. It requires less space, uses less material, and is easier for staff to clean and manage.
- Add buckets, scoops, sieves, funnels, pipes, channels, molds, and measuring containers. Store them close to the area so children can access and return them independently.
- Cover sand when it is not in use and check it regularly for waste, sharp objects, and animal contamination. Empty water containers after each session to prevent stagnant water.
- Use non-slip surfacing around water tables and avoid deep containers. All water-play activities should remain within direct staff supervision.
7. Role Play House
ละครเวที supports children’s social-emotional skills, communication, and imagination. Moving the role-play house outdoors provides a more spacious play area without disturbing quieter indoor activities. Children can also bring leaves, stones, soil, and other natural materials into their stories, making the play more open-ended and creative.
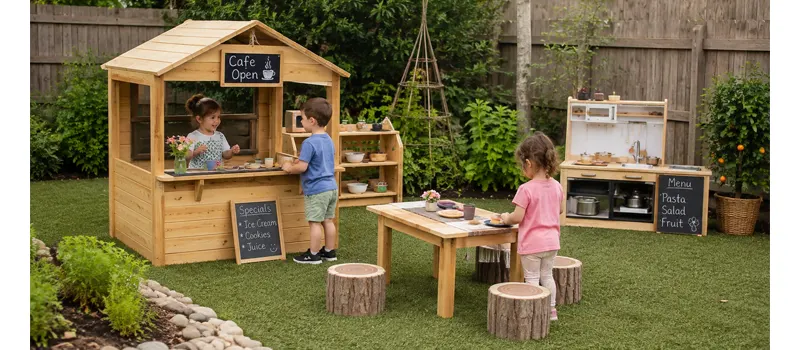
- Opt for semi-open or strictly framed designs without solid doors or window panes. This configuration gives children a psychological sense of their own space while allowing you a continuous, unobstructed line of sight for supervision.
- Use movable furniture, signs, pretend food, dolls, and simple props to change the theme.
- Check doors, windows, and moving parts for finger traps or spaces where a child’s head could become caught.
- Rotate only a few props at a time. Children often create richer play when the area is not overloaded.
8. Multi-Activity Playground
When you build a multi-activity playground, your primary goal is to support gross motor development. By setting up multi-dimensional physical challenges, you help children improve their coordination, core strength, and spatial awareness.
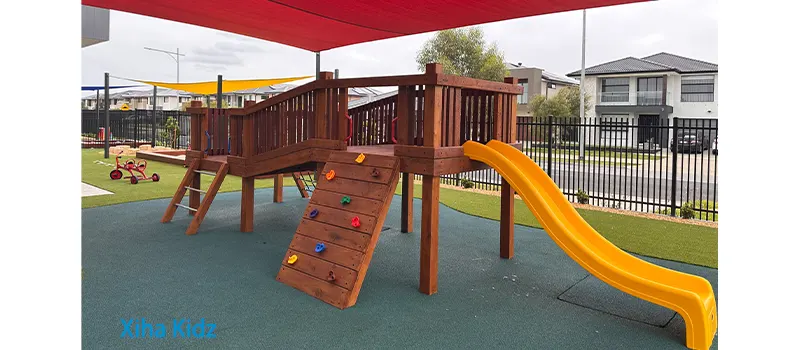
- Select activities that suit the children’s ages and abilities rather than choosing the structure with the most features. You can choose อุปกรณ์สนามเด็กเล่น such as climbing nets, slides, and balance beams based on your child’s age group.
- Plan clear movement routes so slide exits, climbing points, and platforms do not create conflicts. Consider how many children can use the structure at the same time without crowding.
- Keep the required safety area free from benches, storage, planters, and other obstacles.
- For any equipment with a fall height exceeding 60 cm, you must surface the surrounding fall zones with compliant impact-attenuating materials.
9. Mini Obstacle Course
Unlike fixed playground equipment, mini obstacle courses can be adjusted to accommodate a child’s growing confidence. Furthermore, mini obstacle courses are more flexible to set up and are significantly cheaper than fixed playground equipment. By providing targeted physical challenges, you help them calculate distance, manage their center of gravity, and refine their agility.
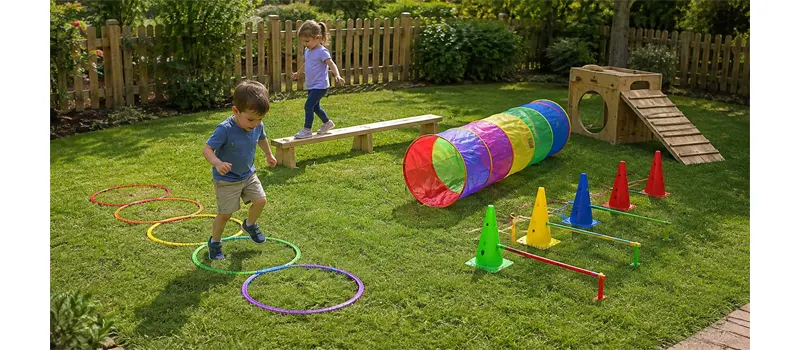
- Build the course with low beams, stepping pods, tunnels, hoops, ramps, cones, and crawling frames. Arrange the course according to standard early childhood stride lengths. You should ensure the gaps require physical effort but remain safely within their developmental limits.
- Begin with short, low routes. Increase the difficulty by changing distances, heights, surfaces, or movement instructions.
- If you incorporate crawl tunnels, select diameters exceeding 60 cm. You must ensure these enclosures allow adequate ambient light and provide you with a clear line of sight from multiple angles for supervision.
- You need to install anti-slip texturing on all angled or elevated surfaces. Secure all movable components flush to the ground to prevent lateral shifting during dynamic, high-impact use.
10. Music Corner
An outdoor music corner should make use of sounds that are difficult to explore indoors. Children can strike large instruments, listen to the wind and rain, and create rhythms with natural materials. This area allows children to explore acoustic properties like pitch, resonance, and rhythm through direct physical interaction.
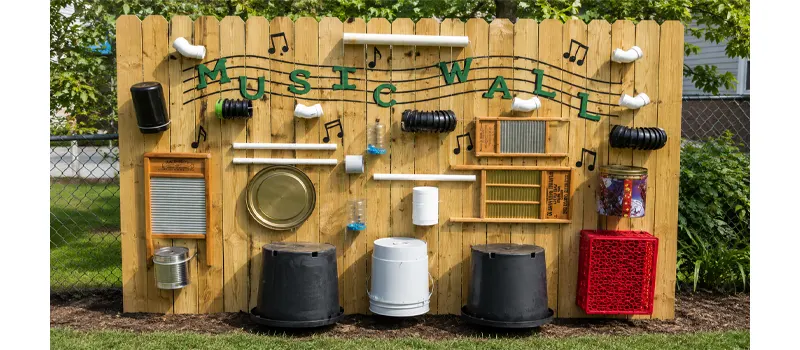
- Install weather-resistant sound equipment such as outdoor drums, timber xylophones, sound tubes, rain wheels, and securely mounted chimes.
- Add natural sound materials such as sticks, stones, seed pods, bamboo, and different wood pieces. Children can compare how each material sounds when tapped, shaken, or rubbed.
- Arrange instruments along a fence or curved sound wall instead of placing everything in the center. Leave an open area in front for dancing, group rhythm games, and performances.
- Use wind chimes or rain-activated instruments where children can observe how weather creates sound, but avoid placing them where constant noise could disturb classrooms or neighbours.
- Choose materials that can drain and dry after rain. Check regularly for rust, splinters, sharp edges, loose fittings, trapped water, and excessive sound levels.
11. Ride-On Track
A ride-on track creates a safe route for tricycles, scooters, and other ride-on toys. Children develop balance, steering, and spatial awareness while also learning to stop, wait, follow directions, and share the road.
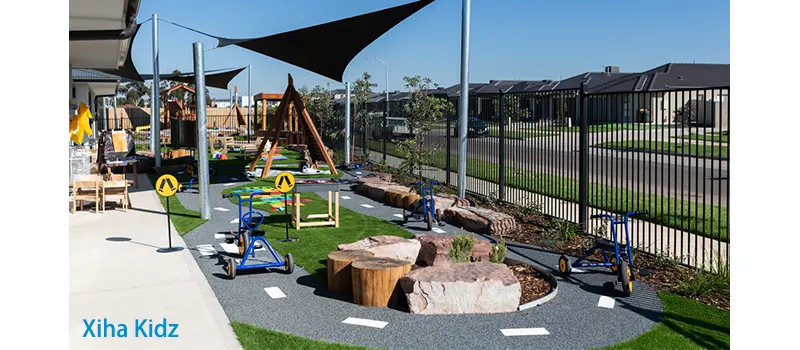
- Choose a smooth, level, non-slip surface and avoid steep slopes and sharp turns.
- Use a continuous loop instead of a route with dead ends. Make turns wide enough for children to move without frequent collisions.
- Add arrows, stop signs, crossings, parking bays, or a pretend service station to connect physical activity with role-play.
- Provide different ride-on sizes and store them in a parking area outside the main track.
คำถามที่พบบ่อย
How much outdoor space does a preschool need per child?
A useful benchmark is about 75 sq. ft. (7 m²) of outdoor space per child. However, licensing requirements vary by country and region. Therefore, always check local childcare and playground regulations before finalizing your site plan.
How do you create shade in a preschool outdoor area?
Shade can come from trees, pergolas, shade sails, covered patios, or roofed outdoor structures. When planning shade, consider how the sun position changes throughout the day rather than only looking at the space at one time.
How can you make a preschool outdoor area safer?
Start with clear sightlines, secure fencing, age-appropriate equipment, safe surfacing, and enough space between activity zones. Equipment should be checked regularly for loose parts, damage, or other hazards.
What is the best surface for a preschool outdoor area?
Use impact-absorbing surfacing under climbing and other fall-risk equipment. Rubber surfacing and engineered wood fiber are common choices, while turf or paving can work in low-risk areas. Always match the surface to local playground safety standards.
Can one outdoor area serve more than one purpose?
Yes. A covered area can support group learning, art, reading, and performances at different times. Movable furniture and portable storage make this easier. However, avoid combining activities that conflict, such as quiet reading and noisy music, or water play and fast-moving ride-on traffic.
How can a preschool use its outdoor area throughout the year?
Plan for local weather from the beginning. Shade, covered activity areas, drainage, wind protection, and weather-resistant storage can extend daily use. In colder or wetter climates, focus on surfaces that drain quickly and equipment that remains safe after rain, frost, or seasonal temperature changes.
บทสรุป
You do not need to overcrowd an outdoor space with excessive features. Instead, you should choose the most suitable functional area based on factors such as age structure, daily activity schedule, local climate conditions, available space, and budget. Even one or two well-planned areas can provide meaningful support for children’s learning and development.
ซีฮา คิดส์ can help turn your preferred ideas into a practical outdoor solution. Based on your site and project needs, we can plan the layout, select suitable equipment, customize products, manage production and quality control, arrange shipping, and provide installation guidance—all through one supplier.


 Thai
Thai  English
  Arabic
  French
  Italian
  German
  Spanish
  Japanese