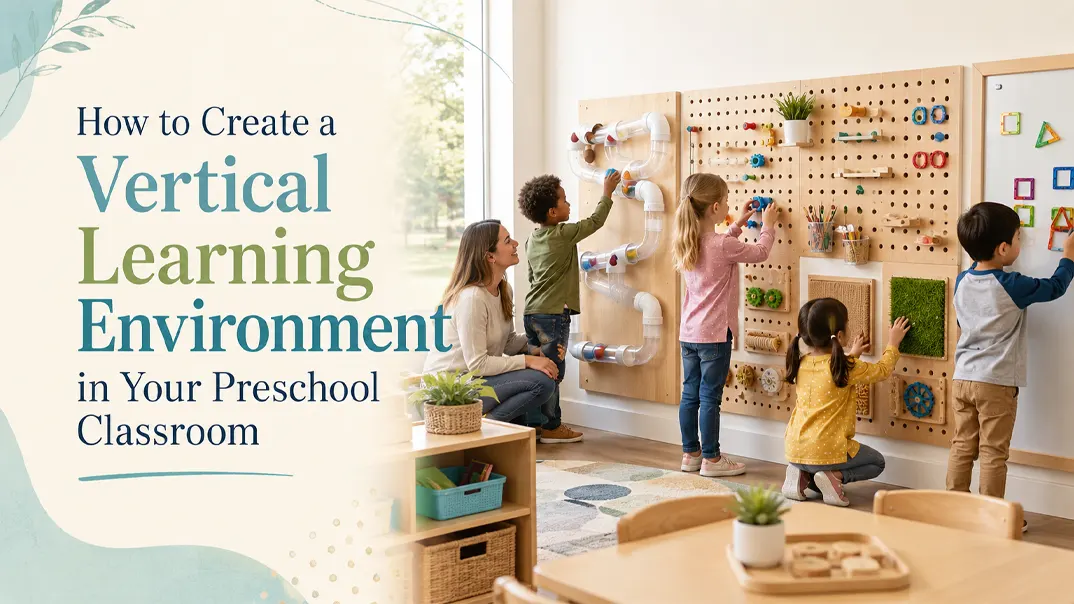
Many preschool classrooms have plenty of wall space, but much of it is still used only for posters, artwork, or decoration. Vertical learning gives you another way to use that space by turning walls into areas where children can play and learn.
This guide will help you understand vertical learning. You will learn how to transform ordinary wall space into valuable areas in a learning environment that support a child’s growth without taking up floor space.
What Is Vertical Learning?
Vertical learning is exactly what it sounds like: getting children out of their chairs and having them work, play, and create on a vertical surface rather than a flat table.
This doesn’t just mean standing at a traditional wooden easel. It means utilizing the blank walls, the classroom windows, the back of a door, or even the side of a filing cabinet. By simply moving the learning materials from a horizontal plane to a vertical one, you create a different way for children to use their bodies, interact with materials, and engage in learning.
Why is Vertical Learning Important?
When children work on an upright surface, they use their bodies differently, move more freely, and interact with materials from a new position. This can support both physical development and active learning.
Supports Shoulder and Arm Strength
Working on a vertical surface encourages children to lift and move their arms against gravity. These movements help build shoulder stability and upper-body control, which are also useful for drawing, writing, and other daily tasks.
Encourages Crossing the Midline
When working on a large wall space, a child will naturally reach across their body with their dominant hand to grab a marker or place a sticker on the opposite side. This physical crossing of the body’s midline helps build connections between the brain’s left and right hemispheres.
Improves Visual Attention
When materials are positioned at eye level on a wall, children don’t have to look down and strain their necks. The task is right in front of them, which naturally blocks out visual distractions from the rest of the room and increases their focus.
Makes Better Use of Classroom Space
Floor space is limited in many preschool classrooms. Vertical Learning allows you to add activities without filling the room with more tables or classroom furniture. An unused wall can become a useful learning area while keeping important pathways and open play space clear.
How to Turn Your Classroom Walls Into Vertical Learning Spaces?
Implementing vertical learning doesn’t require a complete classroom renovation or a huge budget. Many administrators hesitate, fearing damage to walls or exceeding budget. However, converting a classroom into a vertical learning center is simply about optimizing the use of existing space.
1. Decide What You Want Children to Do
Before adding anything to the wall, ask yourself one simple question: What will children actually do here?
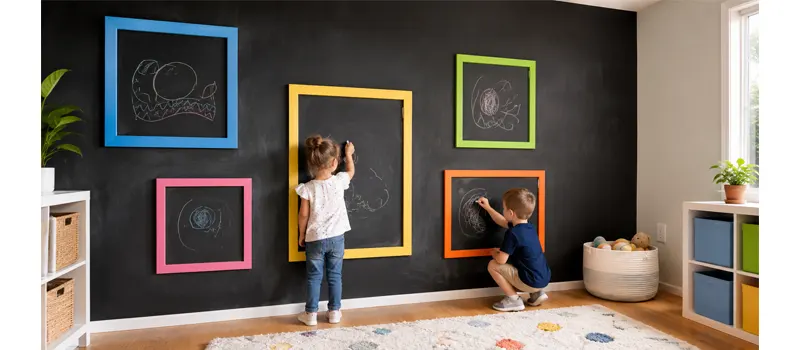
You may want them to draw, build, or explore sensory materials. Once the purpose is clear, it becomes much easier to choose the right surface and materials. For example, if you want children to explore letters and numbers, a magnetic wall may work well. If you want to encourage art, you may need a large wipeable surface instead.
2. Choose a Wall Children Can Use Comfortably
Look for a wall with open floor space directly in front of it. Children should be able to walk up to the wall, stand, reach, and move sideways without having to squeeze between furniture. Leave around 3–4 ft (90–120 cm) of clear space in front of the wall. If several children will use it together, provide more room.
3. Keep Vertical Learning Area at Children’s Eye Level
A vertical learning wall must be designed for the child. Keep the primary interactive zones precisely at their chest-to-eye level. Ensure that frequently used materials can be reached and manipulated without constant adult assistance.
Use the lower and middle parts of the wall for interactive materials. You can reserve higher areas for display work. For mixed-age classrooms, place the most frequently used materials low enough for the youngest children who are expected to use the area.
4. Choose the Surface Based on the Activity
Match the surface to what children will actually do.
| Activity | Suitable Surface |
|---|---|
| Drawing and early writing | Whiteboard or chalkboard |
| Letters, numbers, and sorting | Magnetic wall |
| Storytelling | Felt board |
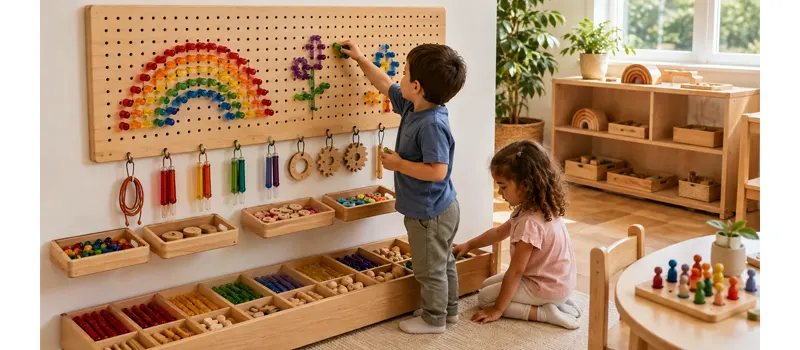
| Building and loose parts | Pegboard or activity panel |
| Painting | Washable wall or paper roll system |
| Sensory exploration | Tactile or sensory panel |
| Ball runs and STEM play | Wall-mounted track or construction panel |
If you want to change activities regularly, choose a flexible surface such as a magnetic board or pegboard rather than a permanently fixed activity panel.
5. Store Materials Close to the Wall
You can place low shelves or lockers next to or below the activity wall, or choose wall-mounted storage. Position each material at a child-friendly height for easy access and return.
Avoid storing too many materials at once. If more than ten different activity materials are displayed on one wall, children may spend more time searching for materials than learning.
6. Protect the Wall and Plan for Cleanup
Vertical activities can easily leave markers, paint, glue, or sensory materials beyond the working area. Before children start using the space, protect both the wall and the floor around it.
You can place a wide border of painter’s tape around the working surface. This gives children a clear boundary and helps keep stray crayon or marker marks off the painted wall.
For messy activities such as painting, water play, or sensory exploration, you can place a washable drop cloth or plastic splash mat underneath the station.
7. Make Sure Everything Is Secure
Vertical Learning equipment receives more pulling and pushing than ordinary wall decoration. Any panel, rail, hook, mirror, track, or board should be securely fixed before children use it.
Check for:
- loose wall fixings;
- sharp corners or exposed hardware;
- detachable small parts;
- heavy objects mounted too high;
- finger-trap areas;
- damaged surfaces or cracked panels.
You should check wall-mounted equipment regularly rather than treating installation as a one-time safety check.
8. Start Simple and Adjust the Space
You do not need to build a large activity wall immediately. Start with one surface and a small number of materials.
Watch how children actually use it. If they struggle to reach the top, lower the materials. If several children crowd into the same spot, widen the activity area. If certain materials are rarely touched, replace them. Our goal is not to fill the wall. Our goal is to create a wall that children can reach, understand, and use independently.
Vertical Learning Ideas for Preschool Classrooms
Once you have prepared the wall space, the next step is choosing activities and materials children can actually use. The best vertical learning activities are simple, hands-on, and easy to change as children’s interests develop.
Baking Pan Wall
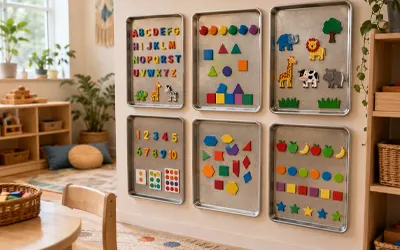
A Baking Pan Wall is a simple and low-cost way to create a magnetic learning surface. Mount shallow metal baking pans securely to the wall at children’s height, then provide magnetic letters, numbers, shapes, pictures, or loose parts. You can change the materials easily, so the same wall can support literacy, math, sorting, matching, and open-ended play.
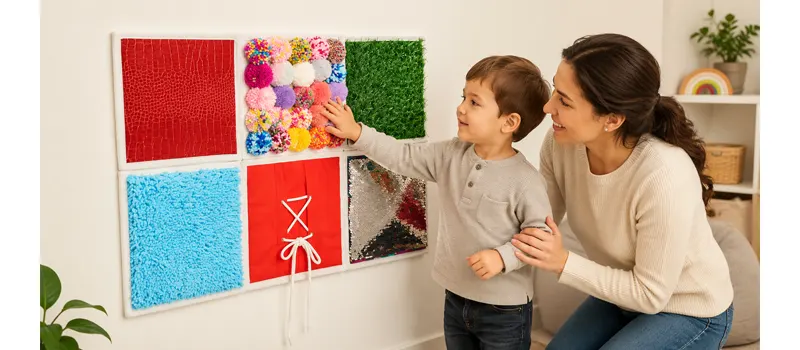
Sensory Exploration Wall
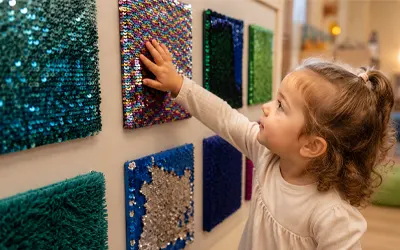
You can buy educational playboards with various textures and moving parts directly, or make your own by attaching blocks of different materials to the wall—such as artificial turf, sequined fabric, corrugated cardboard, or smooth metal contact paper. Keep the layout simple and avoid adding too many elements, so children can focus on each experience without the wall becoming overwhelming.
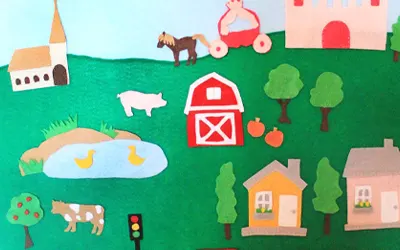
Felt Storytelling Wall
Purchase a large sheet of stiff, neutral-colored felt. You can attach it directly to an empty wall using removable adhesive strips, or suspend it from temporary hooks. Supply children with felt characters, animals, and objects related to your current curriculum theme or a recently read book. Because the felt pieces naturally grip the vertical board, children can move the pieces while retelling familiar stories or creating their own.
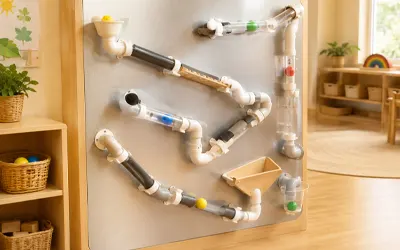
Ball and Tube Wall
Save sturdy cardboard tubes (from paper towels or wrapping paper) or purchase lightweight plastic PVC pipes and funnels. Tape them to a wall or a sliding glass door at various angles using strong painter’s tape. Provide lightweight plastic balls or large pom-poms. Children drop the items into the top funnel and watch them travel through the maze. This setup naturally encourages trial and error: Why did the ball get stuck? How can we change the angle of the tube to make it go faster?
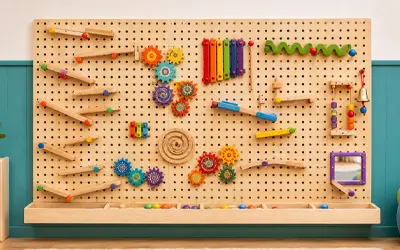
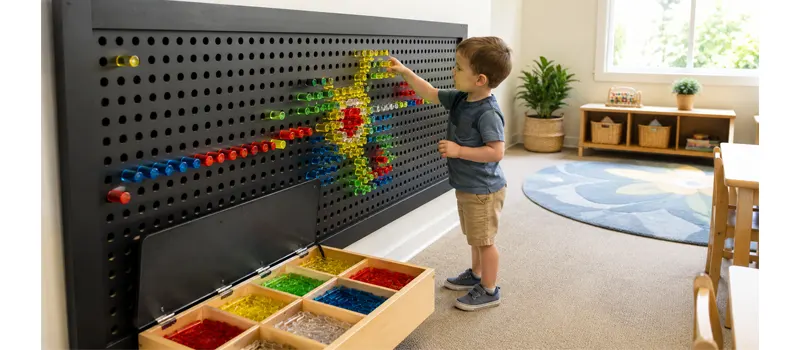
Pegboard Wall Panel
Pegboard Wall Panel gives children a flexible surface for building, arranging, and experimenting with different materials. You can add pegs, hooks, gears, tubes, strings, or larger loose parts that children can move and reposition. It works especially well for construction and STEM activities because children can test different layouts instead of following one fixed design.
Pegboard Wall Panel is one of our best-selling vertical learning products because you can turn it into many different wall activities. By changing pegs, gears, tubes, shelves, or other accessories, you can create new DIY wall toys. One wall system can be adapted for different age groups, learning themes, and classroom needs simply by changing the accessories and activity setup.
One of our best-selling vertical learning products! Turn your empty walls into exciting interactive activities.
FAQs
What age is vertical learning suitable for?
Vertical learning is suitable for all age groups from toddlers to kindergarten, as long as the activity content matches the child’s age, activity level, motor skills, and ability to safely handle materials.
Can vertical learning work in a small preschool classroom?
Yes. It is especially useful in small classrooms because you can add learning activities without adding another table or large floor unit. A narrow unused wall can often become a useful activity area.
Can outdoor walls be used for vertical learning?
Yes. Fences and exterior walls can support chalk drawing, water painting, ball runs, music panels, or nature activities. But make sure the materials and fixings are suitable for outdoor weather and repeated use.
How many vertical learning walls should a classroom have?
You do not need to turn every wall into an activity area. For most classrooms, one to three well-planned stations are more useful than many crowded walls. Start with the areas that support your existing learning centers.
How do I manage turn-taking if every child wants to use the vertical wall at the same time?
Treat your vertical space exactly like your other structured learning centers. You can use simple visual cues to manage traffic. For example, place two small carpet squares or tape two pairs of footprints on the floor directly in front of the wall. This instantly and silently communicates the station’s capacity to the children, preventing overcrowding and minimizing disputes.
Can I create a vertical learning area on a small budget?
Yes. Simple materials such as baking pans, felt boards, paper rolls, pegboards, and chalkboards can be used to create low-cost Vertical Learning activities.
Conclusion
Before adding another table, shelf, or activity unit to your classroom, look at the walls you already have. A well-planned vertical activity area can give children another place to work and explore without reducing the open floor space you need.
If you are planning a new preschool or reorganizing an existing classroom, Xiha Kidz can help you plan the wall space together with your furniture and learning areas. We also provide customizable wall panels and activity equipment, so you can match the setup to different age groups, classroom themes, and available space.



 English
  Arabic
  French
  Italian
  German
  Spanish
  Thai
Thai  Japanese